Configuring a Git Repo for CI / CD Style Pull Requests

Like a lot of senior software folk, I have a particular set of beliefs about how you should use version control. I wrote these down back in June but they amount to:
- develop in a branch named for an issue
- a pull request is made at code push time
- the pull request is required to be reviewed before it is accepted
- the issue branch is merged into develop
- develop is automatically merged into master
Only master goes to production and you never touch develop directly. I've used this particular approach to version control for a number of years now and it really works splendidly. Kudos to favorite pairing partner, Sean Kennedy, for beating this into my head when I was resistant. Respect!
Now while I've used this for a long time, I've never actually set it up on Github; I always deferred to others to do the heavy lifting on this. This blog post outlines what has to happen to repo in order to support this style of development.
Step 1 - Your .git/config File
When you start with your repo, look at the .git/config file. Here's mine:
cat .git/config
[core]
	repositoryformatversion = 0
	filemode = true
	bare = false
	logallrefupdates = true
	ignorecase = true
	precomposeunicode = true
This is actually what we want it to look like:
[core]
	repositoryformatversion = 0
	filemode = true
	bare = false
	logallrefupdates = true
	ignorecase = true
	precomposeunicode = true
[remote "origin"]
	url = git@github.com:gochangeme/web_change_me_now.git
	fetch = +refs/heads/*:refs/remotes/origin/*
[branch "master"]
	remote = origin
	merge = refs/heads/master
[branch "develop"]
	remote = origin
	merge = refs/heads/develop
So our first step is to add a remote "origin". This is done by going to github and creating a repo and then adding it to the existing git repo with:
git remote add origin https://github.com/fuzzygroup/feed_finder.git
git push -u origin master
Step 2 - Adding a develop Branch
Our next step is to add a develop branch. This is first done locally with:
git branch develop
git co develop
You next need to make a change and do the add / commit / push dance. This can be done just by making a one line change to the readme on the repo. After you push with git push origin develop, you need to:
- Go to the settings page for the repo.
- Click on Branches from the sidebar.
- Select develop from the drop down list and then click update.
- Select that you agree with the ramifications of the change from the pop up window.
Step 3 - Adding Branch Protection
The next step is to add a Branch Protection Rule to the develop branch:
- Click "Add Rule" from the "Branch protection rules" section on the Branches tab.
- In Branch name pattern enter develop.
- Select "Require pull request reviews before merging". (Note - even if you are a solo developer, you can still merge by using your Admin privileges check box on the pull request review screen; this is a small usability hiccup for your personal development but it keeps your git practice the same for work and home and that's invaluable; and if that isn't enough, it is how I develop every single day on my side projects)
- Set the "Require approving reviews" drop down to 1.
- Do NOT check off the "Include administrators" option or you won't be able to override the approval requirement on your personal repos.
- Click Save Changes
When you have completed the changes above, you want to work in a branch and then push to that branch. I illustrate this below:
➜  feed_finder git:(1-circle-ci) git push origin 1-circle-ci
Counting objects: 14, done.
Delta compression using up to 4 threads.
Compressing objects: 100% (13/13), done.
Writing objects: 100% (14/14), 2.52 KiB | 0 bytes/s, done.
Total 14 (delta 10), reused 0 (delta 0)
remote: Resolving deltas: 100% (10/10), completed with 10 local objects.
remote:
remote: Create a pull request for '1-circle-ci' on GitHub by visiting:
remote:      https://github.com/fuzzygroup/feed_finder/pull/new/1-circle-ci
remote:
To github.com:fuzzygroup/feed_finder.git
 * [new branch]      1-circle-ci -> 1-circle-ci
You'll notice that Github now returns a url as part of the push. This pull request needs to be approved at Github so after your push is done, follow the url onto Github and click the Create pull request button:
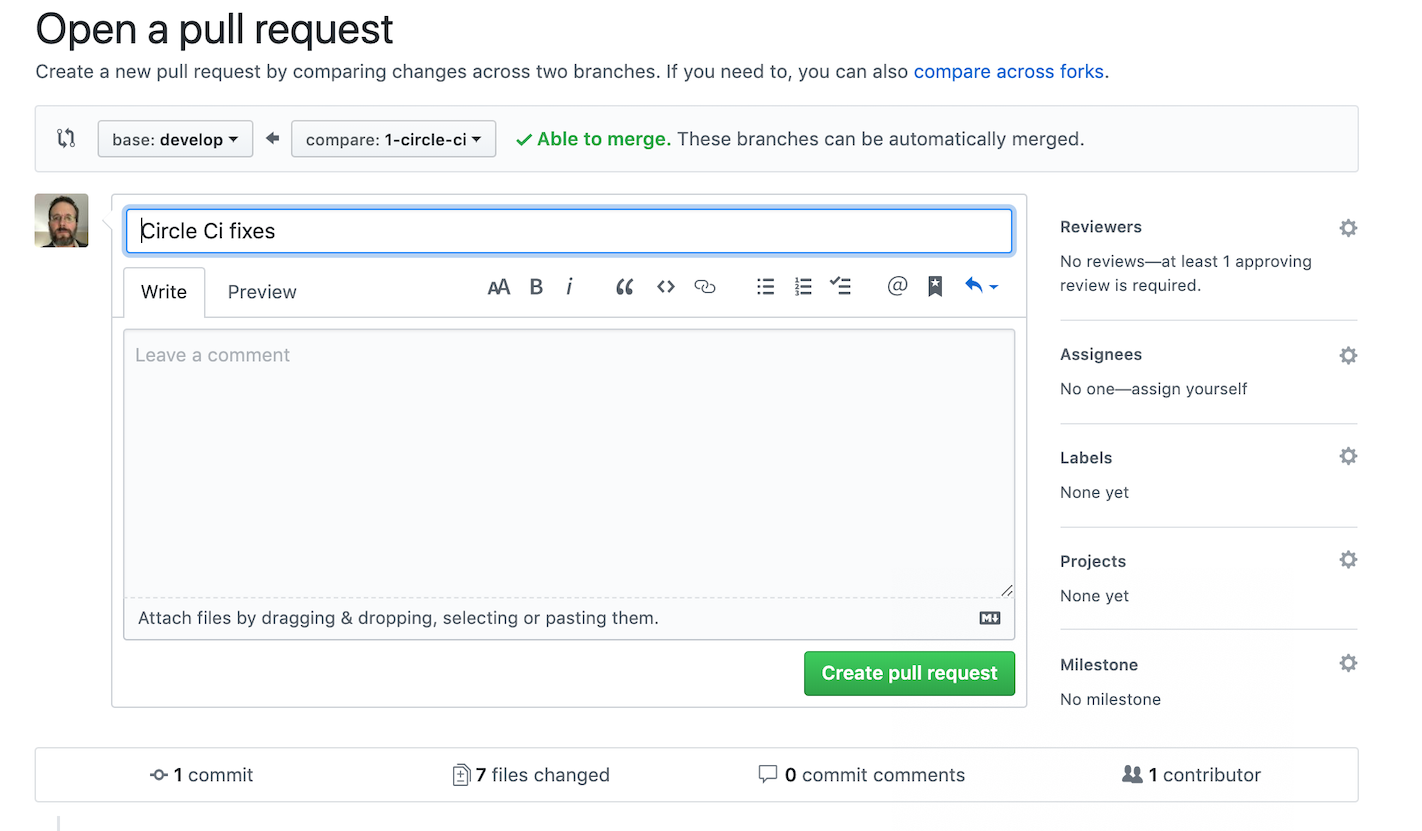
Click the Create Pull Request button and you'll see the Merge Pull Request screen. Click the Merge pull request button.

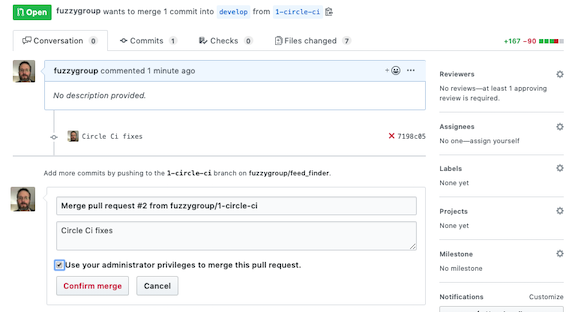
Now since you don't have another person on the project, you need to merge it yourself with your Administrator privileges by toggling the check box and then the Confirm merge button:
This becomes your entire workflow for git:
- Develop in a branch.
- Push to the branch.
- Create the pull request.
- Merge the pull request.
After that the CI / CD software handles:
- merging your branch into develop
and
- if the merge succeeds then merging develop into master
and
- deploying master (if you continue down this path; deploy won't be covered in this article)
Step 4 - Adding CI / CD with Circle CI
The next step is to add CI / CD with Circle CI. You want to go over to CircleCI and login with your Github credentials.
- At the project list, under your Github credentials, select the repo you want to build and click the Follow button.
- On the next page CircleCI directs you to add a .circleci/config.yml file to your project. This is a yml file that describes how to build your software and run your tests. Below I have a sample one for my project, feed_finder, a Ruby on Rails app. Obviously yours would differ.
# Ruby CircleCI 2.0
version: 2
jobs:
  build:
    docker:
      - image: circleci/ruby:2.5.1-node-browsers
      - image: circleci/mysql:8.0.4
        command: [--default-authentication-plugin=mysql_native_password]
        environment:
          MYSQL_ROOT_PASSWORD: testpass
          MYSQL_DATABASE: feed_finder_test
          MYSQL_USER: testuser
          MYSQL_PASSWORD: testpass
          MYSQL_ROOT_HOST: "127.0.0.1"

    working_directory: ~/repo

    steps:
      - checkout

      # Download and cache dependencies
      - restore_cache:
          keys:
            - v1-dependencies-
            # fallback to using the latest cache if no exact match is found
            - v1-dependencies-

      - run:
          name: install dependencies
          command: |
            bundle install --jobs=4 --retry=3 --path vendor/bundle

      - save_cache:
          paths:
            - ./vendor/bundle
          key: v1-dependencies-

      - run:
          # Our primary container isn't MYSQL so run a sleep command until it's ready.
          name: Waiting for MySQL to be ready
          command: |
            for i in `seq 1 30`;
            do
              nc -z 127.0.0.1 3306 && echo Success && exit 0
              echo -n .
              sleep 1
            done
            echo Failed waiting for MySQL && exit 1

      # Database setup
      - run: RAILS_ENV=test bundle exec rake db:create
      - run: RAILS_ENV=test bundle exec rake db:schema:load

      # run tests
      - run:
          name: run tests
          command: |
            mkdir /tmp/test-results
            TEST_FILES="$(circleci tests glob "spec/**/*_spec.rb" | circleci tests split --split-by=timings)"
            bundle exec rspec --format progress \
              --format RspecJunitFormatter \
              --out /tmp/test-results/rspec.xml \
              --format progress \
              $TEST_FILES

      # collect reports
      - store_test_results:
          path: /tmp/test-results
      - store_artifacts:
          path: /tmp/test-results
          destination: test-results
Note: A lot of this is cribbed from this article on Ember.
- The next step is to go into the Github Marketplace and add a Free CircleCI plan to your Github account.
- Go into CircleCI and authenticate with your Github credentials.
- Go to the Add Project section where you will see a list of all your GitHub repositories.
- Click Setup Project on your repo.
- Select Linux as the operating system and Ruby as the language (or whatever).
- Click Start Building and watch it fly along.
Note: This blog post is currently incomplete; I'm still finishing the CI / CD portion but I had to deploy it immediately to share with a coworker.
Posted In: #git #software_engineering