Working with Windows 10 Pro HyperVisor When You Are a Mac Guy
So that data center migration that I mentioned recently has turned into not, well a disaster, but a bit of challenge. The problem at hand was how to get data off three large MySQL databases, about 4 terabytes in size and then capture whatever else was desired and do it all in about 10 days to avoid getting hit with another $5 K data center monthly fee.
Note: If you want a hilarious tale of how this data actually got to the data center in the first place then I highly recommend Anatomy of a Business Trip Gone Horribly Wrong. It was awful at the time but it is funny as hell now. It is also the last time I was in New York, pretty close to where the person who helped me on this actually lives. Small, small world.
All of this data was in Ubuntu virtual machines apparently hosted under Windows Server Hyper-V. Why any hosting company worth their salt would ever opt to run a *nix based operating system under the Windows Hyper-V, well, I don't understand. Sigh. I'll come back to this if I have the mental energy to engage in a rant.
My initial approach was to roll a custom backup solution which took a prioritized list of databases and tables and them dumped the data using mysqldump, split the data with the unix split tool and then gzipped each split file. Finally it uploaded it to S3, deleting its in process work files as it goes. Yes this sounds awfully convoluted but rolling your own means that you actually understand what it is in and isn't doing – something critical when you are know the original hardware is going away forever. And since I didn't have much in the way of free disc space, this could not be done all at once.
Using this approach we transferred over 400 gigs of data to S3. Given that this was gzip compressed data without the MySQL index overhead, which takes up a huge amount of the raw disc space, we got a sizable percentage of the data. And, yes, that's why I blogged about bmon recently – I was monitoring these transfers.
Naturally, by the power of Murphy's Law, I wasn't able to get it all. So this called for mechanism #2 – hard drives. I delivered to the data center several three terabyte drives with instructions to the effect of "Get these mounted and I'll do the rest". My plan was to just use ansible to recursively copy the directory structures onto the hard drives, get the drives back and then go on my merry way. Remember – all I wanted was the data.
Sadly the hosting company was never able to get these hard drives to show up in the Ubuntu virtual machine that is running under the Windows Hyper-V. I don't understand why but since I wasn't physically in the data center, I couldn't do much about it. With time running out the hosting company suggested "Why don't we just copy the virtual machines onto the hard drives and then you can have your exact environment and do what you want".
That sounds great, doesn't it? I mean who wouldn't want their old servers back, right? Well, me actually. Once again, what I wanted was my data. I didn't want the virtual machines but since I have them, here's how I went about using them.
My thanks go out to Nick who walked me thru large parts of this and edited this documentation. I'm a *nix guy who last used Windows XP in 2004. The experience was, well, illuminating to say the least. I'm sure that I will return to this in a future blog post.
Here were the initial steps that I had to follow to get ready to use these virtual machines.
- Buy a Windows laptop. This was the first step. I took a trip to the local Frys and managed to find a refurbished HP laptop for only $500. The key thing here is that you need Windows 10 Pro. If you don't have Windows 10 Pro you don't have the Hyper-V tools. And since Windows 10 Pro is about $200, well, it really is cheaper to buy it installed.
- Set the BIOS Options to Enable Virtualization. Every BIOS is different so I can't tell you where / how to do this. I had to press F10 during the boot process and navigate thru all the options until I found the virtualization options and turned them on. If you don't do this then the HyperVisor itself won't start and you won't be able to run virtual machines.
- Install the HyperV Manager in Windows. We enabled hyper-v by searching for "windows features" and then turned it on.
- Connect the USB Drive / Drives. This was just a plug and play operation so piece of cake.
- Label the Physical Drives. This is optional but since I have 26 virtual machines spread across three physical hard drives so I used my label maker to indicate which virtual machines are on which hard drive.
Once I had the hard drives attached, the next step was to actually deal with the virtual machines. Even though I had actual .vhdx virtual machine files, for some bizarre reason, I was unable to use them directly. Instead I had to recreate the virtual machine from scratch, yes, 26 times, and then attach the .vhdx file as a drive. This process was something like this:
Note: I say "something like this" because I'm writing this from memory after a long, long day.
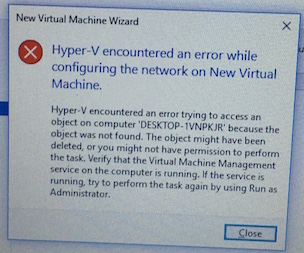
- In the HyperVisor Manager, start by creating a virtual network interface. This needs to be your very first step because without it you can't attach the .vhdx files – you wil die on errors like "Hyper-V encountered an error while configuring the network on New Virtual Machine". This should be called NIC#1 or at least this is what I needed.
- Create a new virtual machine and walk thru the steps and in the last step browse to the .vhdx file and select it.
- But if your vhdx file is actually in two parts then you don't want to browse to the .vhdx file at all. Instead create the virtual machine and then edit its settings after the fact and attach the multiple .vhdx files at that stage.
- Once your .vhdx files are attached as per #2 or #3 then you can actually make use of them. Remember that these really are virtual machines and, well, you still have some hoops to jump through. The first step is to turn on the virtual machine.
- After the virtual machine is running you then need to connect to it. And this, dear reader, is where you will be confronted by a login prompt – and you will realize that you've been using SSH keys to login for over two years now and you have no idea what the password is.
- A quick email back to the data center staff will elicit information like "well it might be this username and this password or it might be this other username and this other password".
- Here's where I'm going to argue against rational security practices and say use your label maker again and attach the different username / password combos physically to each backup hard drive. Trust me – when I need this data for real sometime in the next six months I'm going to be wondering where the heck that text message with the details disappeared to.
- Once you've resolved the username and password info you can actually get into a database server virtual machine and verify that, well, it appears to be actual data. I mean the directories appear to be there and the data appears to be real. Huzzah!
- You sudo su to root and the do a passwd actual_username and reset that password to something insecure but easy (again these are virtual machines on hard drives on a development laptop; its ok).
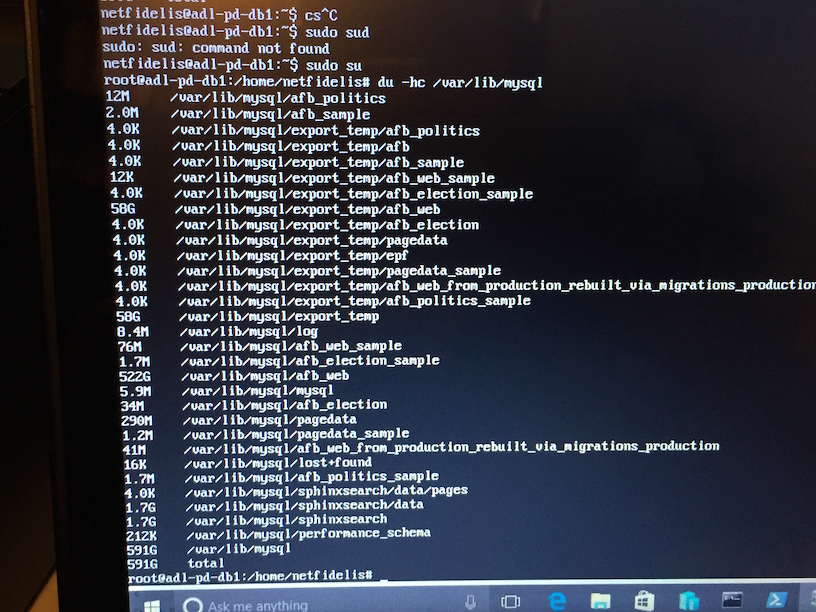
- And then the grim spectre of reality strikes – you go and start MySQL and you get this wonderful kick to the nuts: "The partition with /var/lib/mysql is too full".
And that's where I stopped. As best I can tell I actually have the data and the virtual machines but I don't know if the data is actually valid. My guess is that verifying this is likely about a full week of repetitive, manual, unscriptable work.
Here are some screenshots I captured along with way. And yes, because I don't have the equivalent of command+shift+4 on OSX, I used my phone. Alas.
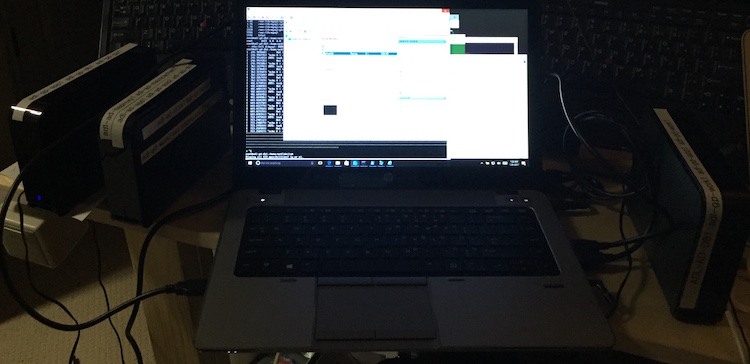
Windows Hardware On My Desk
The Error when You Don't have a Virtual Network Adapter
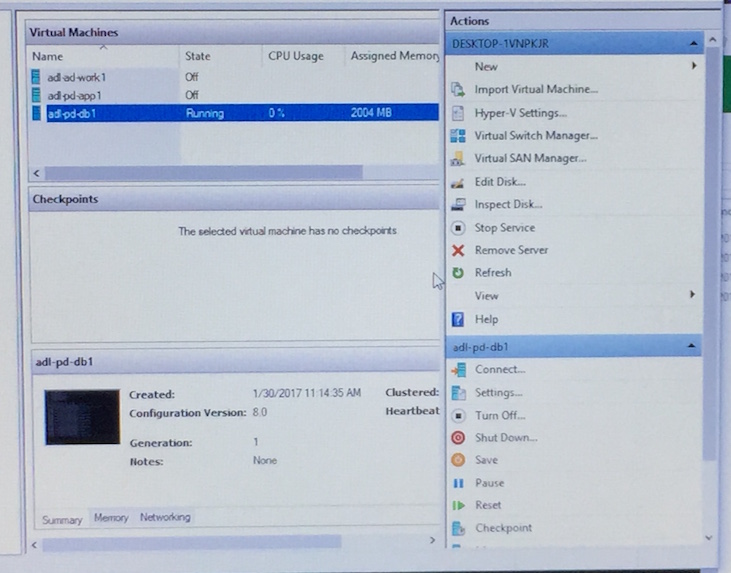
The HyperV Manager
An Ubuntu Virtual Machine Running Under HyperV