AWS Tutorial 07 - Understanding Elastic IPs
Any ec2 instance, let's call it a node for simplicity's sake, in AWS has a number of network settings that define how you access it. Here's an example:
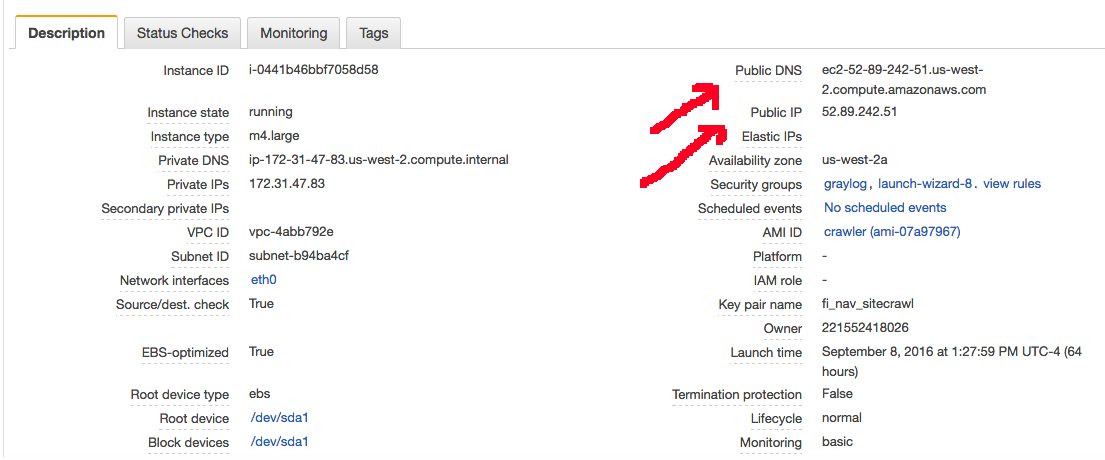
So this box has both a public IP and a public DNS address. And these are how you access the node - until its restarted. At which point the node will be assigned a fresh IP address and a matching DNS address. And, at this point, your SSH settings / browser settings for accessing that box need to be reset. And if you're using an SSH config file to make accessing the box easy, well, you have to change it. And that sucks.
The key here is to assign an Elastic IP Address to the box so a consistent ip address and matching domain name is persistently attached to the node so even if you restart it / resize it / etc, you can always access it in the same way.
Here's how to do that:
- In your AWS console goto EC2 instances
- Look along the left hand table of contents bar until you find Network and Security and click Elastic IPs and you should see something like this:
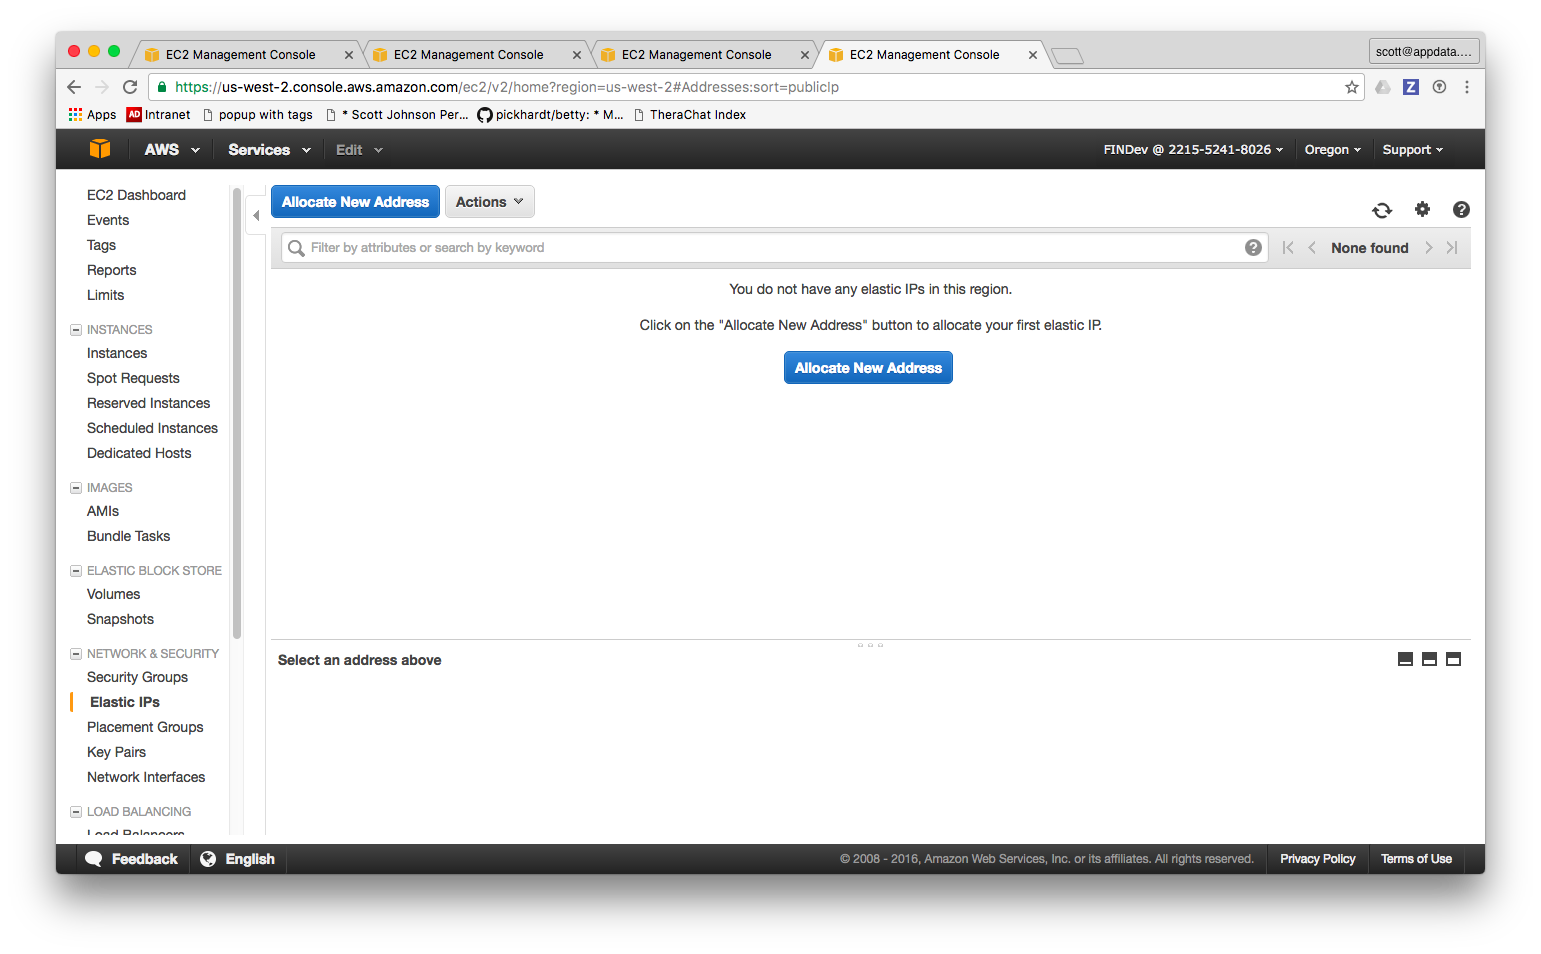
- Click Allocate New Address.
- Answer Yes and you'll get this:
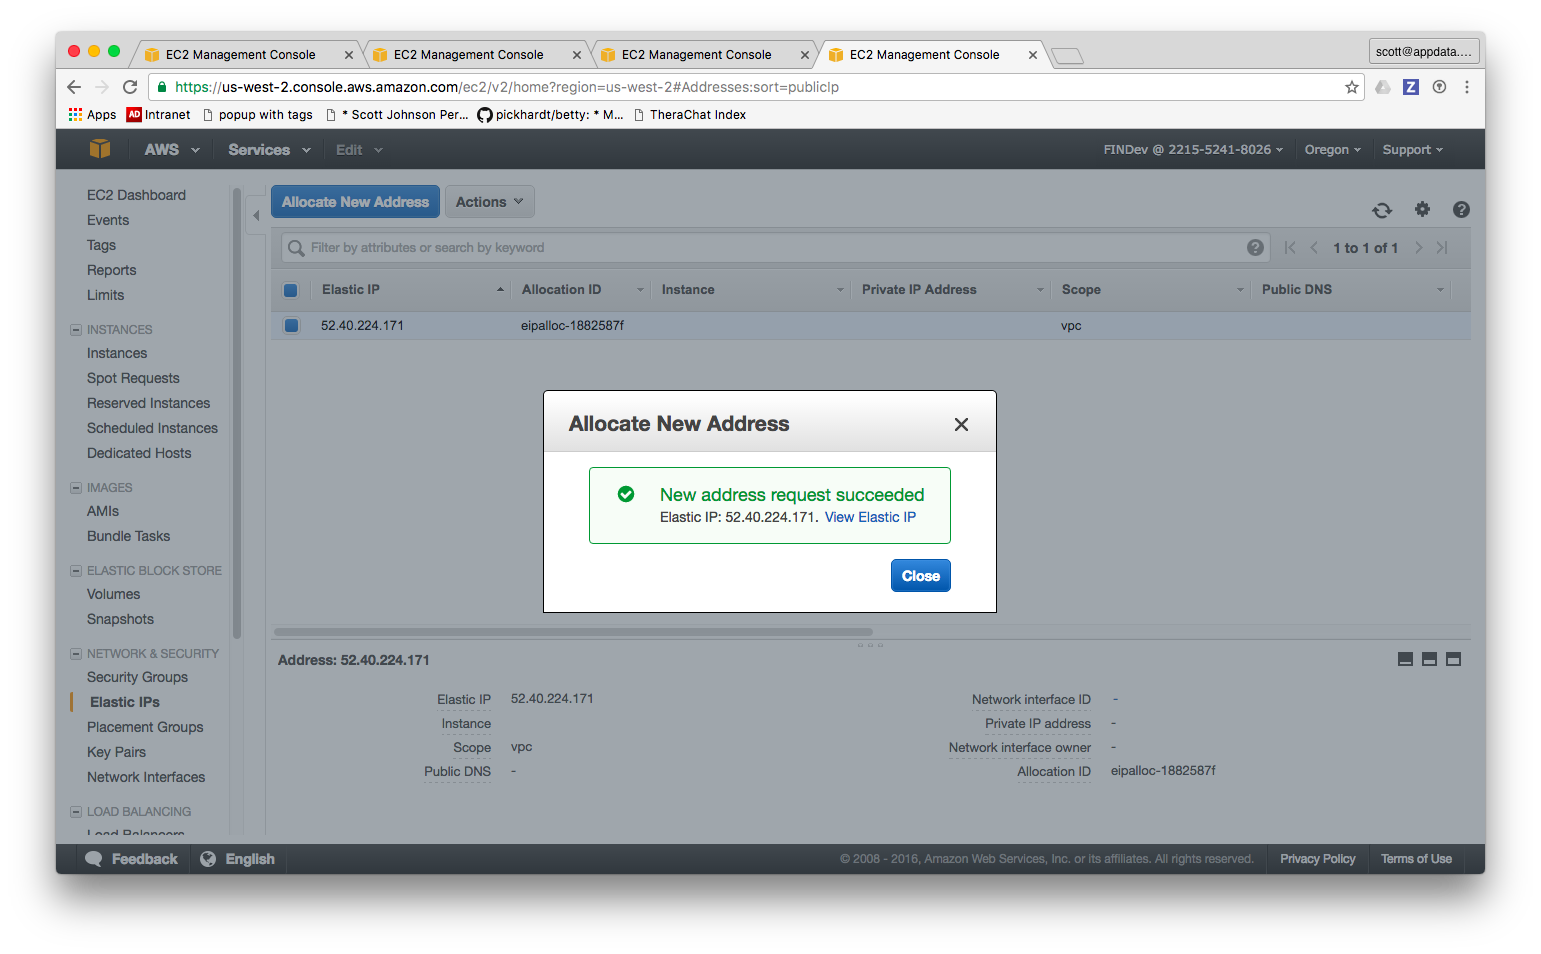
- Go up to the actions menu and click Associate Address:
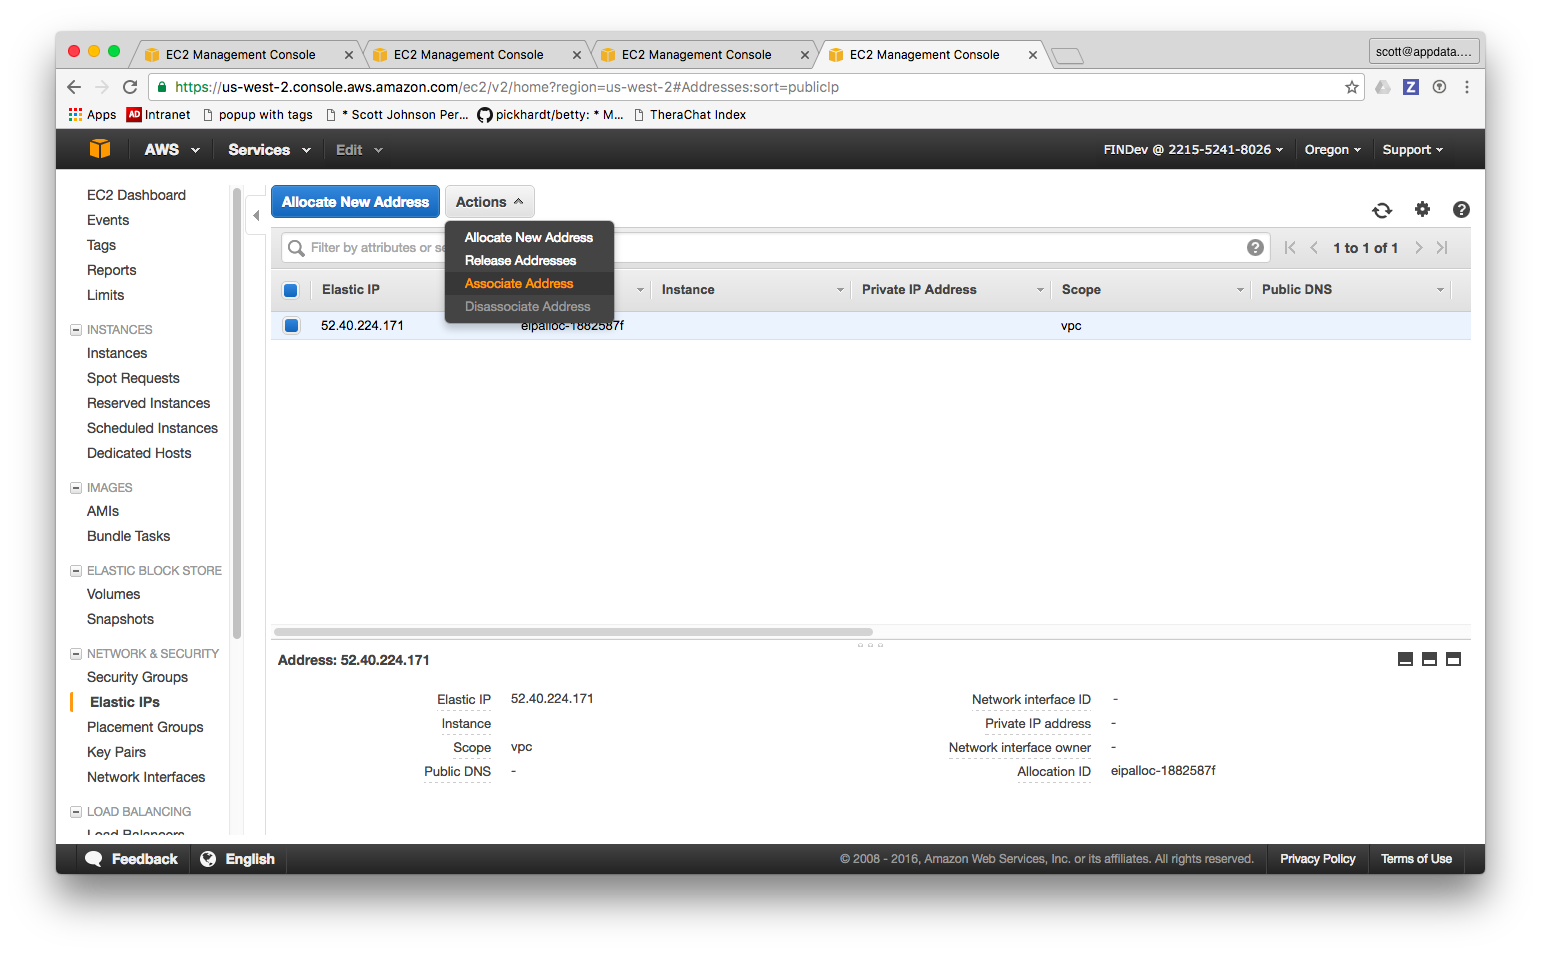
- Start to type in the name tag of the node or another way to identify it:
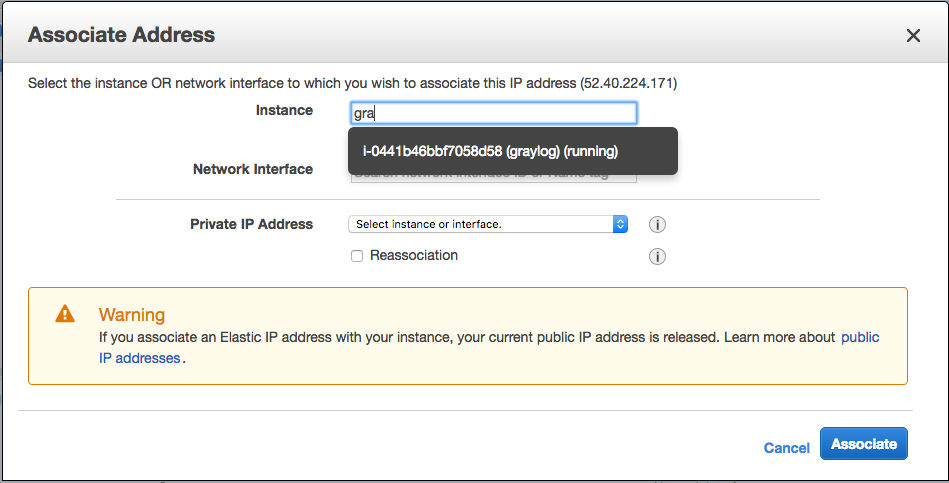
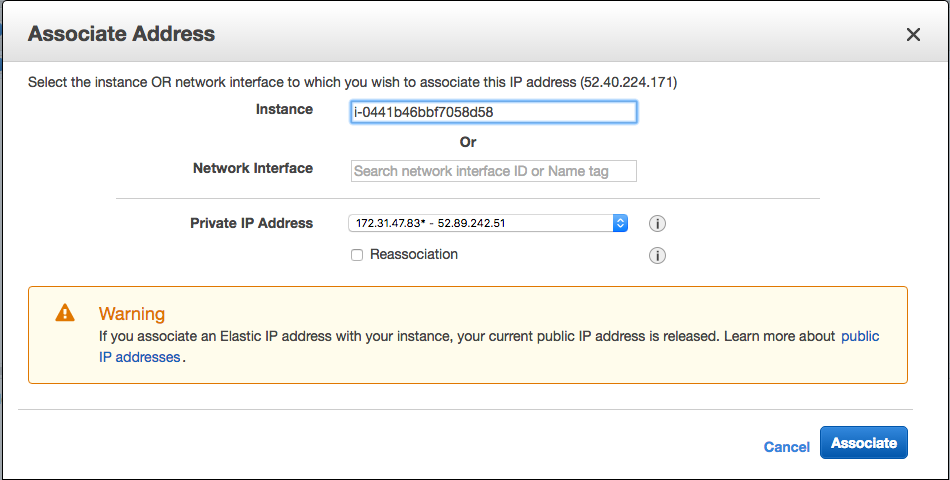
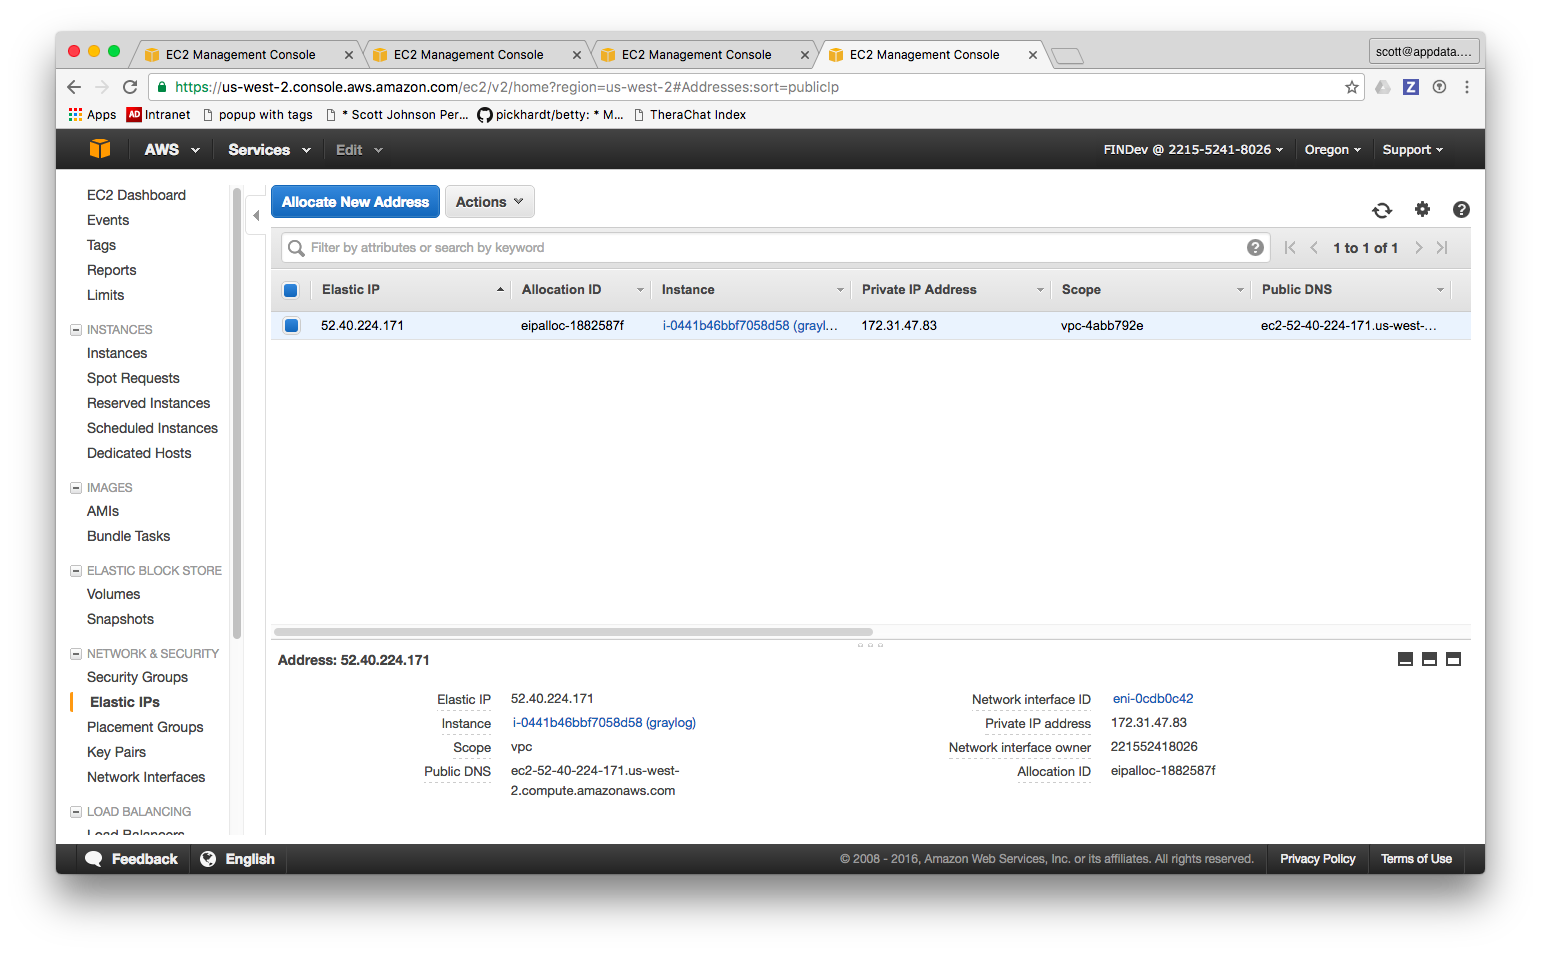
And, wham! Your box now has a permanent IP address associated with it. You can now use that for SSH / DNS / SSH config files, etc.
Notes
There are some issues with Elastic IPs that you need to understand:
- Setting an elastic IP releases your current public IP so if you're used to that you need to take note
- You get allocated only 5 free elastic IPs with you account. After that you pay for them so use wisely
- You might be able to get around the limit of 5 by taking a dynamic DNS approach but I haven't explored that myself
Posted In: #aws #elastic_ip #networking